


8.
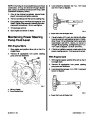
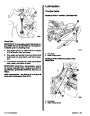
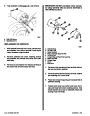
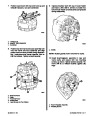
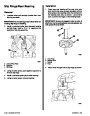
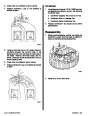
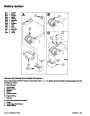
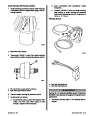
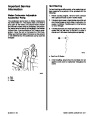
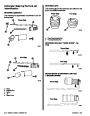
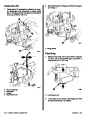
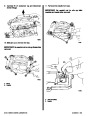
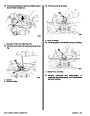
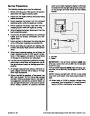
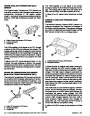
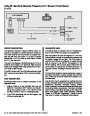
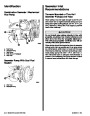
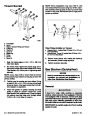
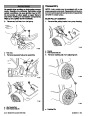
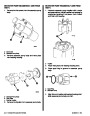
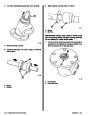
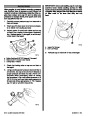
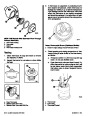
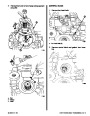
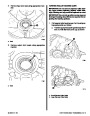
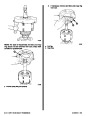
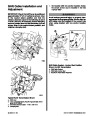
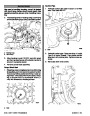
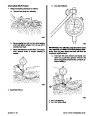
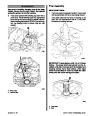
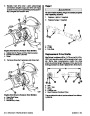
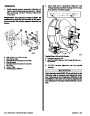
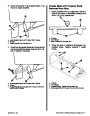
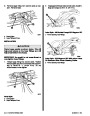
Connect high tension coil lead.
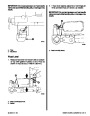
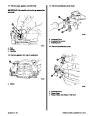
8. Manually close throttle to bring engine down to
idle state.
b
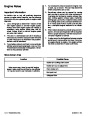
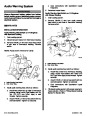
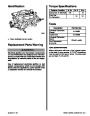
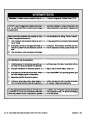
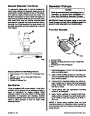
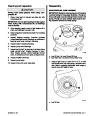
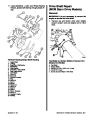
Spark Plug Replacement
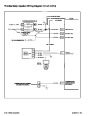
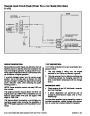
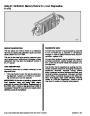
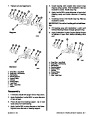
SPARK PLUG WIRING AND BOOT
PRECAUTIONS
a
1.
2.
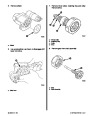
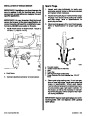
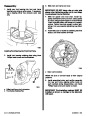
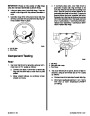
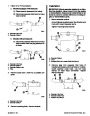
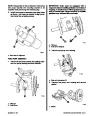
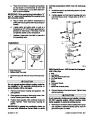
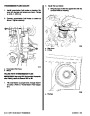
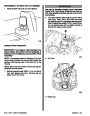
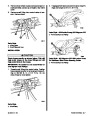
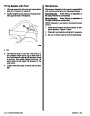
Twist boots one-half turn before removing.
When removing boot, DO NOT use pliers or
other sharp tools which might tear the boot.
3.
4.
DO NOT force any object between the wire
and the boot or through the silicone jacket of
the wiring.
72921
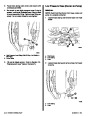
DO NOT pull on the wires to remove the boot.
Pull on the boot or use a tool designed for this
purpose.
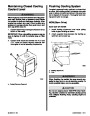
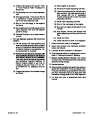
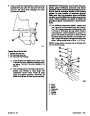
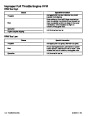
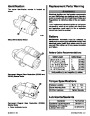
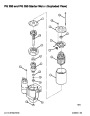
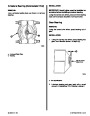
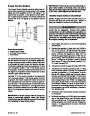
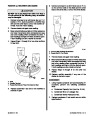
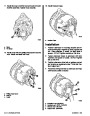
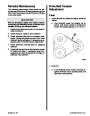
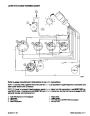
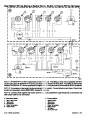
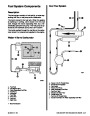
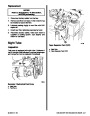
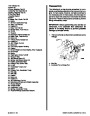
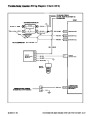
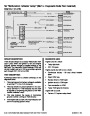
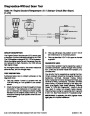
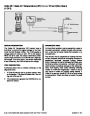
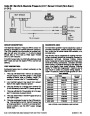
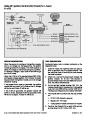
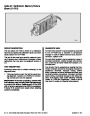
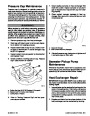
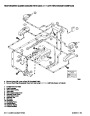
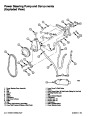
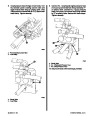
a - Wire Harness Connection
b - High Tension Coil Lead Connection
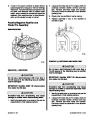
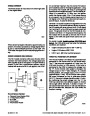
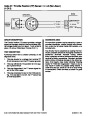
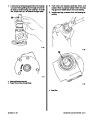
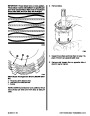
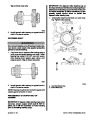
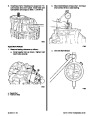
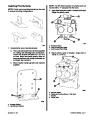
5. Special care must be used when installing
spark plug boots to ensure that the metal ter-
minal within the boot is fully seated on the
spark plug terminal and that the boot has not
moved on the wire. If boot-to-wire movement
has occurred, the boot will give a fast visual
impression of being seated. To make sure
that boots have been properly installed, push
sideways on them. If they have been correctly
installed, the boots will fit tightly with only a
slight looseness. If the terminal has not been
firmly seated on the spark plug, only the re-
sistance of the rubber boot will be felt when
pushed sideways.
9.
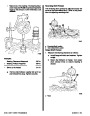
Connect wire harness connectors.
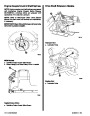
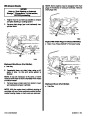
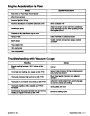
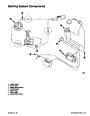
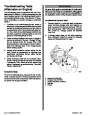
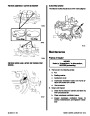
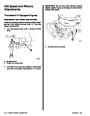
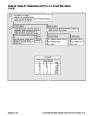
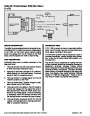
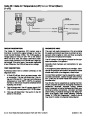
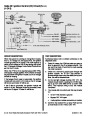
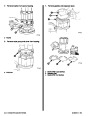
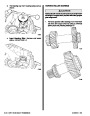
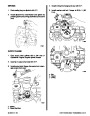
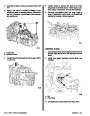
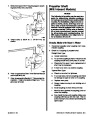
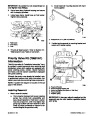
IGNITION TIMING SET PROCEDURE
The engine must be at NORMAL OPERATING TEM-
PERATURE for this adjustment. Two items of test
equipment are required: an inductive pickup timing
light and either a Scan Tool, Diagnostic Code Tool, or
MerCruiser Special Timing Tool (91-805747A1).
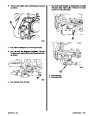
1.
2.
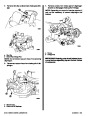
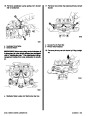
Connect timing light to number 1 ignition wire.
Connect the appropriate tool (as listed above) to
the DLC connector of the wiring harness.
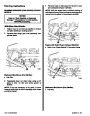
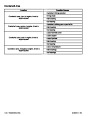
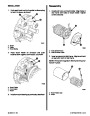
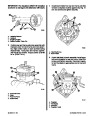
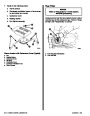
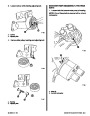
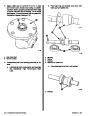
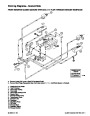
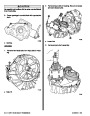
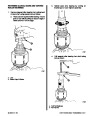
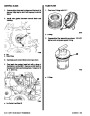
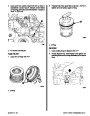
REMOVAL
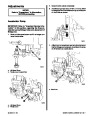
3.
4.
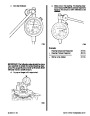
Manually adjust the engine throttle to 1800 RPM
1.
2.
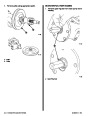
Disconnect spark plug wires from spark plugs.
Remove spark plugs.
+
200.
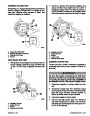
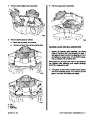
If Not Using MerCruiser Timing Tool: With en-
gine running, set the scan tool or Diagnostic
Code Tool to service mode.
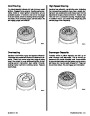
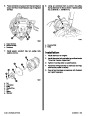
CLEANING AND INSPECTION
1.
Clean spark plugs and spark plug wires with a dry
cloth.
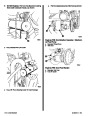
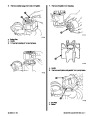
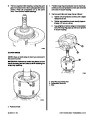
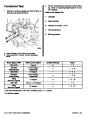
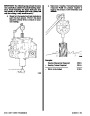
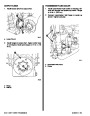
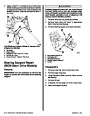
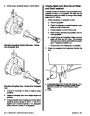
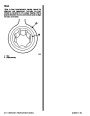
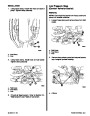
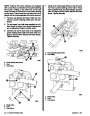
5.
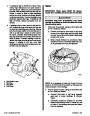
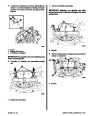
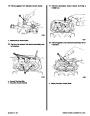
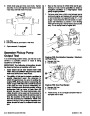
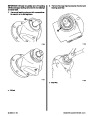
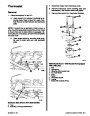
Shine the timing light at the timing mark indicator
located on the timing chain cover.
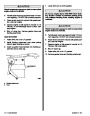
2.
Check each spark plug for wear and gap width
per MerCruiser specifications. Replace any
which fail to meet the standards.
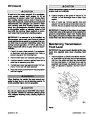
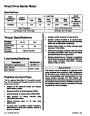
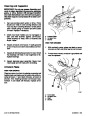
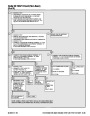
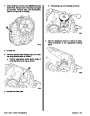
NOTE:Ifadjustmentisneeded,loosenthedistributor
hold-down bolt and rotate the distributor clockwise or
counterclockwise to adjust the timing. Then repeat
the timing light check until the specification (8 de-
grees BTDC) is met.
3.
Check spark plug wires for damage to insulation,
boots and connectors. Replace if necessary.
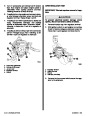
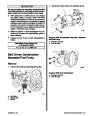
6.
Torque distributor hold-down bolt to 30 lb. ft. (40
N·m).
7.
Set Scan Tool or Diagnostic Code Tool to normal
mode. If using the MerCruiser Special Timing
Tool, disconnect it from DLC connector.
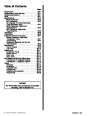
Index
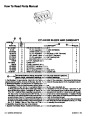
5C-186 - ELECTRONIC FUEL INJECTION (MULTI-PORT AND THROTTLE BODY)
90-823224--2 796
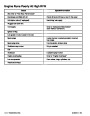
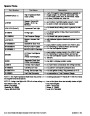
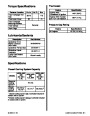
| Categories | Mercury MerCruiser Manuals |
|---|---|
| Tags | Mercury MerCruiser 454 CID, Mercury MerCruiser 502 CID |
| Model Year | 1993, 1994, 1995, 1996, 1997 |
| Download File |
|
| Document File Type | |
| Copyright | Attribution Non-commercial |
(4 votes, average: 4.5 out of 5)
Marine readers have rated 1993 1997 Mercury-MerCruiser GM V8 454 CID 7.4L and 502 CID 8.2L Marine Engines Service Manual Number 16 4.5 out of 5.0 based on 4 product reviews. Hugely helpful service manual! Perfect. Thank you!
Manuals are all Important for Technician
This book is invaluable if you do your own repairs. Great book.
Could not find a copy until a search brought me here.
Excellent print.
Thank you