


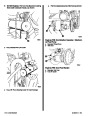


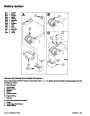


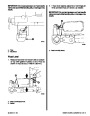


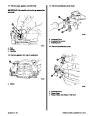


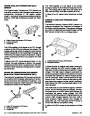


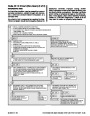


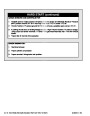


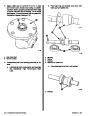


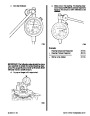


1.
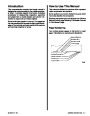
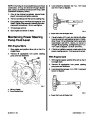
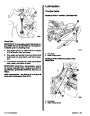
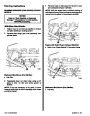
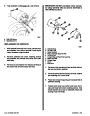
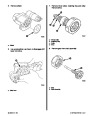
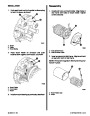
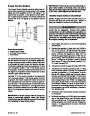
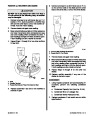
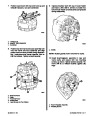
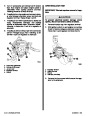
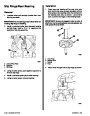
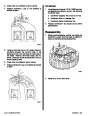
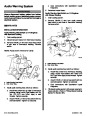
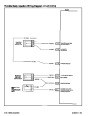
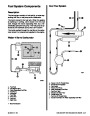
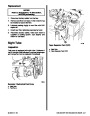
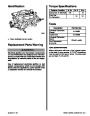
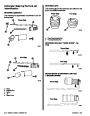
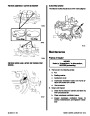
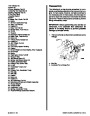
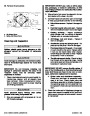
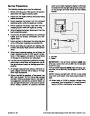
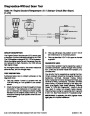
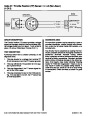
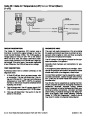
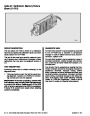
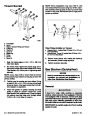
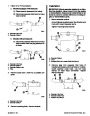
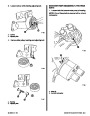
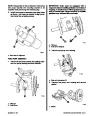
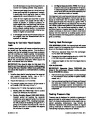
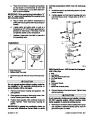
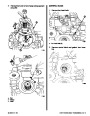
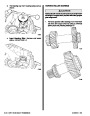
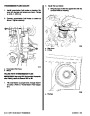
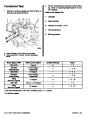
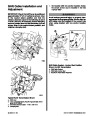
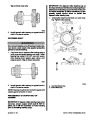
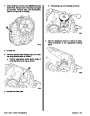
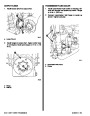
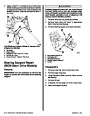
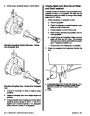
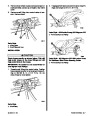
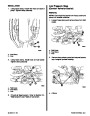
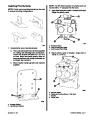
Assemble piston to connecting rod using piston
pin remover as shown. Follow instructions
supplied with kit.
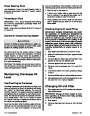
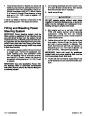
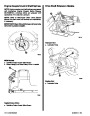
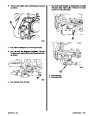
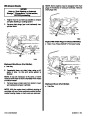
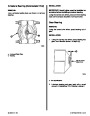
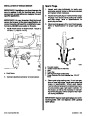
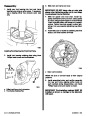
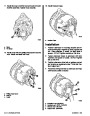
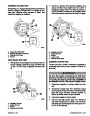
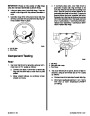
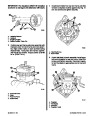
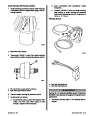
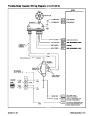
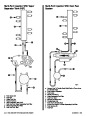
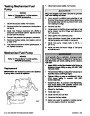
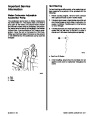
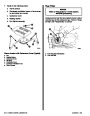
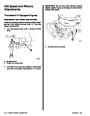
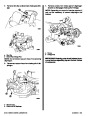
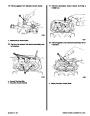
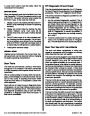
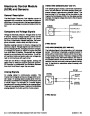
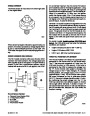
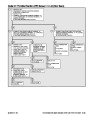
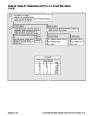
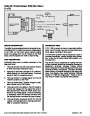
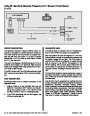
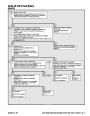
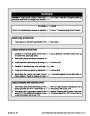
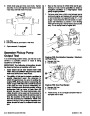
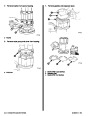
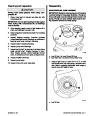
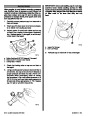
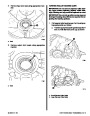
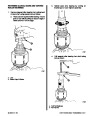
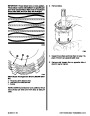
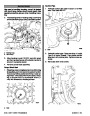
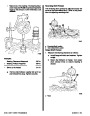
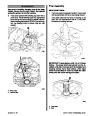
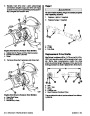
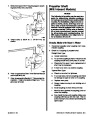
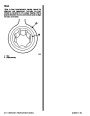
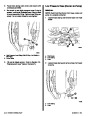
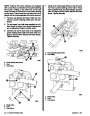
3. Measure gap between ends of ring with a feeler
gauge as shown.
a
72372
4.
5.
If gap between ends of ring is below specifica-
tions, remove ring and try another for fit.
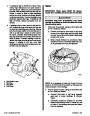
Fit each compression ring to cylinder in which it
is going to be used.
72371
a - Piston Pin Remover (J-24086-C)
6.
7.
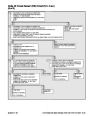
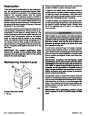
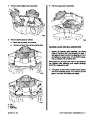
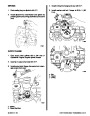
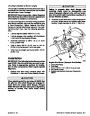
Clean and inspect pistons, if not previously done.
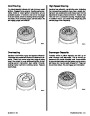
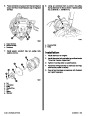
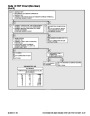
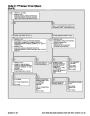
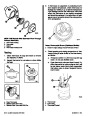
Install piston rings as follows:
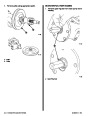
2.
Once assembled, check piston for freedom of
movement (back-and-forth and up-and-down) on
connecting rod. Piston should move freely in all
directions. If it does not, piston pin bore is tight
and piston/pin assembly must be replaced.
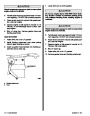
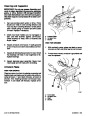
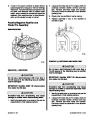
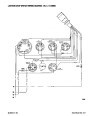
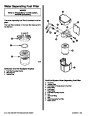
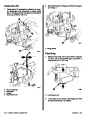
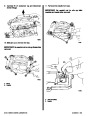
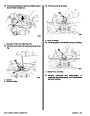
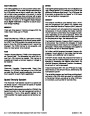
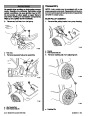
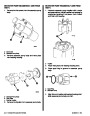
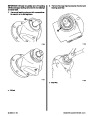
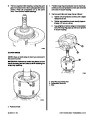
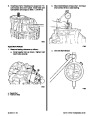
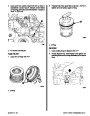
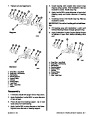
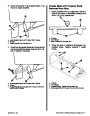
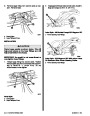
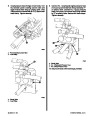
a. Installoilringspaceringrooveandinsertanti-
rotation tang in oil hole.
b. Hold spacer ends butted and install lower
steel oil ring rail with gap properly located.
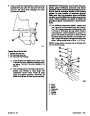
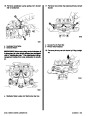
3.
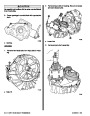
If a new connecting rod has been installed, mark
connecting rod and cap (on side of rod and cap
with slots for connecting rod bearing tangs) with
cylinder number in which it will be installed.
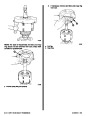
c. Install upper steel oil ring rail with gap proper-
ly located.
d. Flex the oil ring assembly to make sure ring
is free. If binding occurs at any point, the
cause should be determined and, if caused
by ring groove, removed by dressing groove
with a fine cut file. If binding is caused by a
distorted ring, use a new ring.
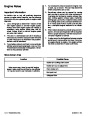
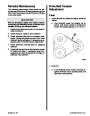
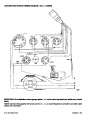
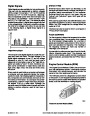
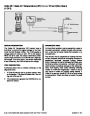
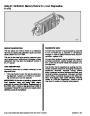
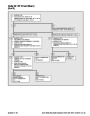
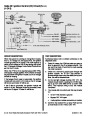
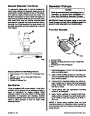
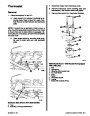
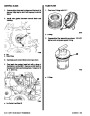
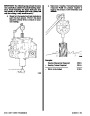
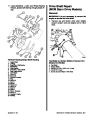
PISTON RINGS
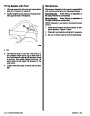
All compression rings are marked on upper side of
ring. When installing compression rings, make sure
that marked side is toward top of piston.
Oil control rings are a three-piece type, consisting of
two rings and a spacer.
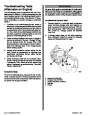
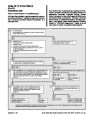
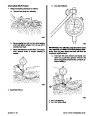
IMPORTANT:
Use
piston
ring
expander
(91-24697)
for compression ring installation.
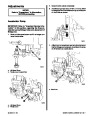
1.
Select rings comparable in size to cylinder bore
and piston size.
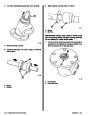
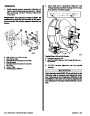
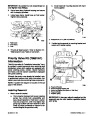
e. Install lower compression ring with marked
side up, using ring expander.
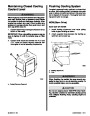
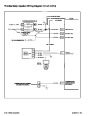
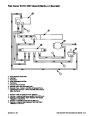
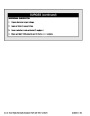
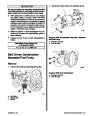
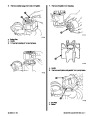
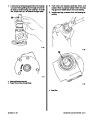
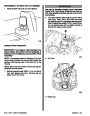
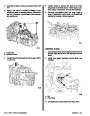
2.
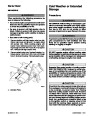
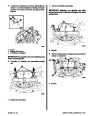
Slip compression ring in cylinder bore, then press
ring down into cylinder bore about 1/4 in. (6 mm)
(below ring travel). Be sure that ring is square
with cylinder wall.
f.
Install top compression ring with marked side
up, using ring expander.
Index
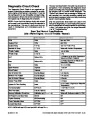
3A-52 - 454 C.I.D. (7.4L) / 502 C.I.D. (8.2L)
90-823224--2 796
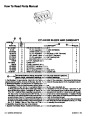
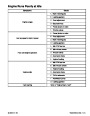
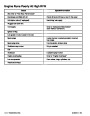
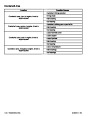
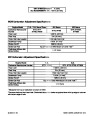
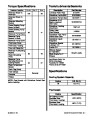
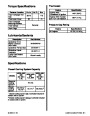
| Categories | Mercury MerCruiser Manuals |
|---|---|
| Tags | Mercury MerCruiser 454 CID, Mercury MerCruiser 502 CID |
| Model Year | 1993, 1994, 1995, 1996, 1997 |
| Download File |
|
| Document File Type | |
| Copyright | Attribution Non-commercial |
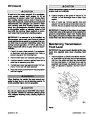
(4 votes, average: 4.5 out of 5)
Marine readers have rated 1993 1997 Mercury-MerCruiser GM V8 454 CID 7.4L and 502 CID 8.2L Marine Engines Service Manual Number 16 4.5 out of 5.0 based on 4 product reviews. Hugely helpful service manual! Perfect. Thank you!
Manuals are all Important for Technician
This book is invaluable if you do your own repairs. Great book.
Could not find a copy until a search brought me here.
Excellent print.
Thank you