


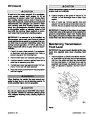
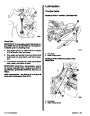

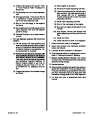


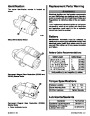


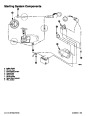

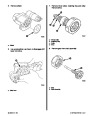


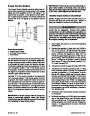


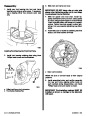
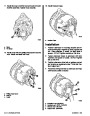


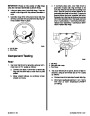
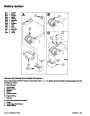


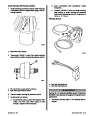


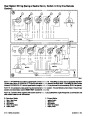

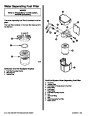
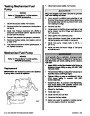
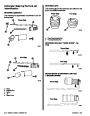
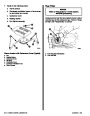
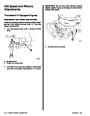


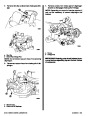


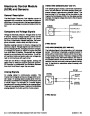


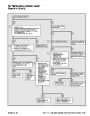


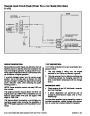
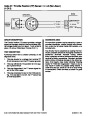
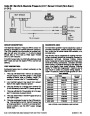
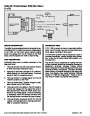


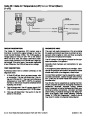

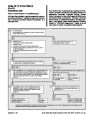


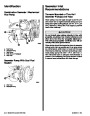
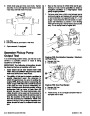
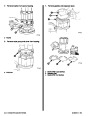
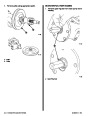
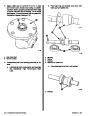


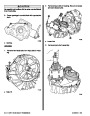


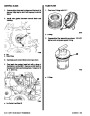


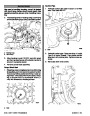


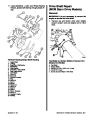
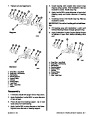
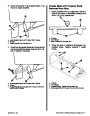


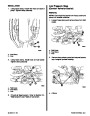


Rotor/Sensor Wheel
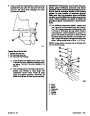
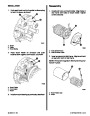
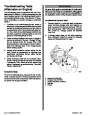
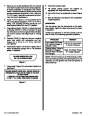
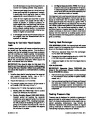
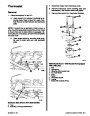
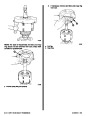
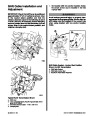
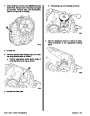
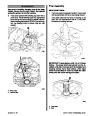
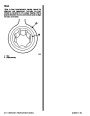
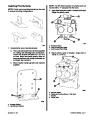
IMPORTANT: If there is any doubt if sensor wheel
is located properly, lay sensor wheel on top of the
figure above with sensor fingers facing up (to-
ward you). Line up three screw holes and locat-
ing pin hole on sensor wheel with the figure. If
wheel is indexed properly all the fingers on wheel
will line up with those in the figure.
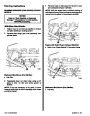
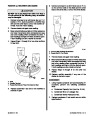
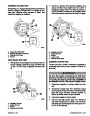
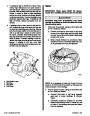
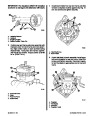
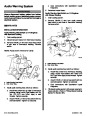
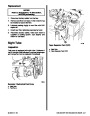
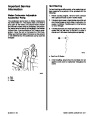
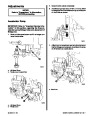
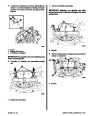
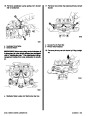
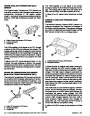
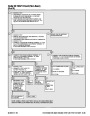
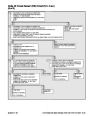
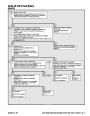
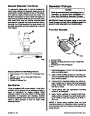
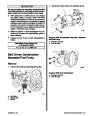
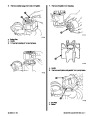
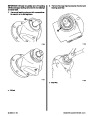
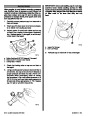
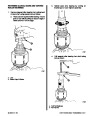
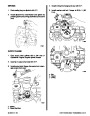
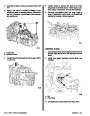
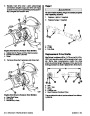
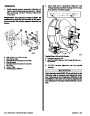
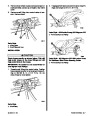
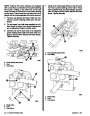
1.
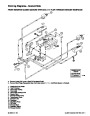
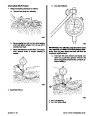
Remove distributor rotor/sensor wheel assembly
from distributor shaft. Rotor and sensor wheel
are secured to the shaft with Loctite. Use two flat
blade screwdrivers. The screwdrivers are posi-
tioned opposite each other with the blade tips on
the underside of the rotor and sensor wheel as-
sembly. Make sure blade tips are toward distribu-
tor shaft until they come in contact with shaft. A
downward push on both screwdriver handles at
the same time will pry off rotor/sensor wheel as-
sembly. The use of torch lamp will also aid in the
removal of the rotor/sensor wheel assembly.
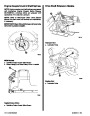
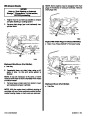
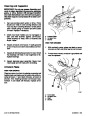
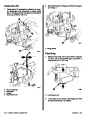
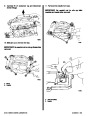
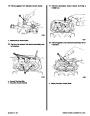
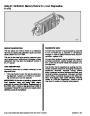
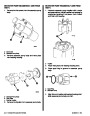
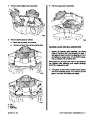
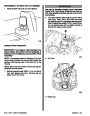
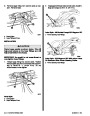
4.
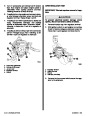
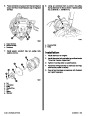
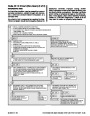
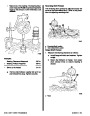
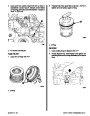
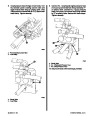
If there are pieces of material shaved off the key
or if it appears to have been damaged by being
forced down while misaligned with slot in distribu-
tor shaft, the rotor must be replaced.
5. Check rotor for burned or corroded center con-
tact.
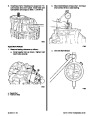
6.
Check rotor for cracks and carbon tracks using
magneto analyzer and instructions supplied with
analyzer.
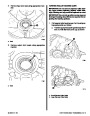
!
WARNING
Wear protective gloves when handling heated ro-
tor/sensor wheel assembly to avoid severe
burns.
7. If rotor is damaged, replace rotor by removing
threehexboltsandseparatingsensorwheelfrom
rotor. Reinstall sensor wheel to new rotor making
sure locating pin on rotor is installed in locating
hole in sensor wheel. Tighten three hex bolts se-
curely.
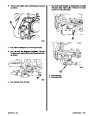
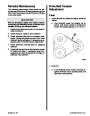
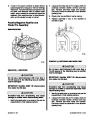
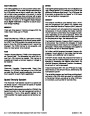
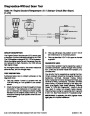
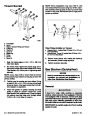
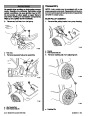
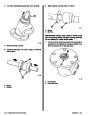
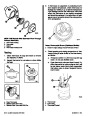
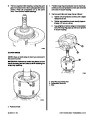
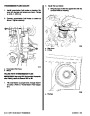
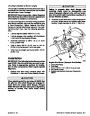
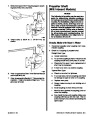
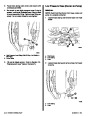
2.
3.
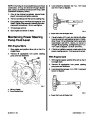
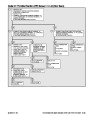
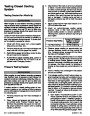
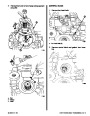
With the rotor/sensor wheel assembly removed,
inspect the locating key inside the rotor.
Thelocatingkeywillappearasacleanedged,1/8
in. (3 mm) wide, sloped ramp at the bottom of the
splined hole.
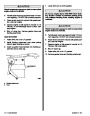
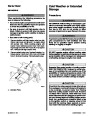
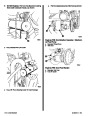
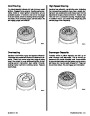
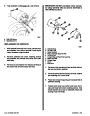
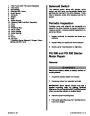
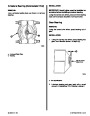
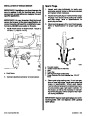
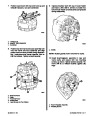
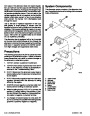
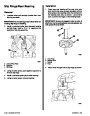
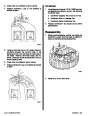
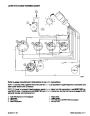
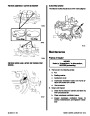
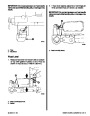
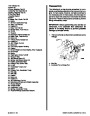
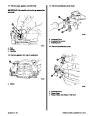
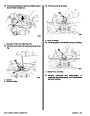
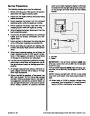
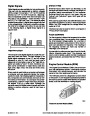
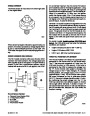
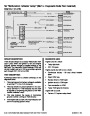
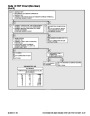
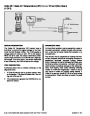
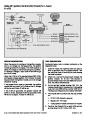
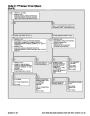
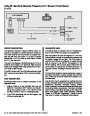
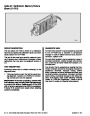
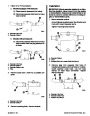
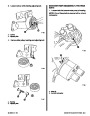
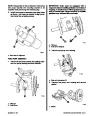
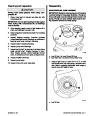
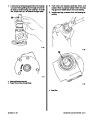
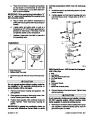
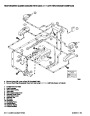
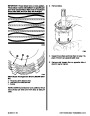
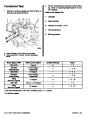
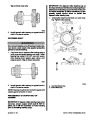
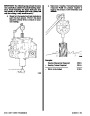
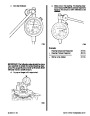
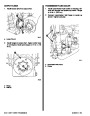
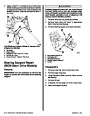
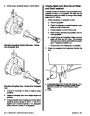
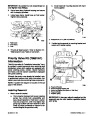
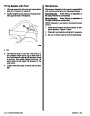
8.
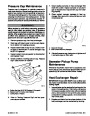
Bend carbon brush tang upward slightly until a
distance of 1/4 in. (6 mm) is obtained between ro-
tor and tang.
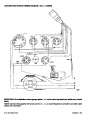
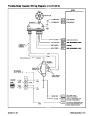
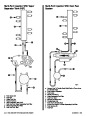
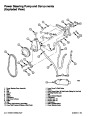
a
b
a
d
72731
c
a - 1/4 in. (6 mm)
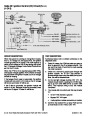
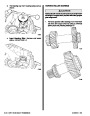
9.
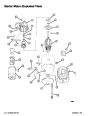
Put 2 drops of Loctite 271 into the rotor so it lands
on the locating key.
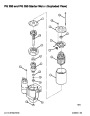
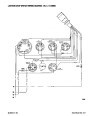
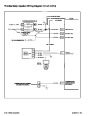
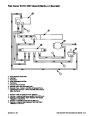
72730
a - Locating Key
b - Screws
c - Senor Wheel
d - Locating Pin
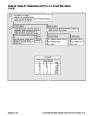
10. Put 2 drops of Loctite 271 in keyway on upper
portion of distributor shaft.
11. Immediately install rotor assembly onto distribu-
tor shaft. Make sure rotor locating key is aligned
with keyway in distributor shaft before pressing
rotor all the way down on the shaft, until it stops,
with the palm of your hand. Let Loctite cure over-
night with distributor in inverted position.
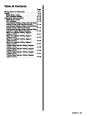
Index
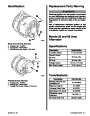
4B-6 - IGNITION SYSTEM
90-823224--2 796
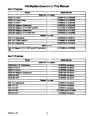
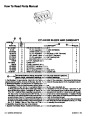
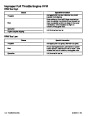
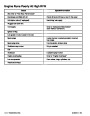
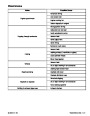
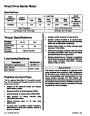
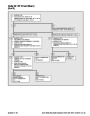
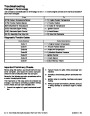
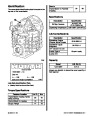
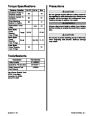
| Categories | Mercury MerCruiser Manuals |
|---|---|
| Tags | Mercury MerCruiser 454 CID, Mercury MerCruiser 502 CID |
| Model Year | 1993, 1994, 1995, 1996, 1997 |
| Download File |
|
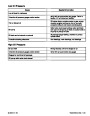
| Document File Type | |
| Copyright | Attribution Non-commercial |
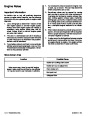
(4 votes, average: 4.5 out of 5)
Marine readers have rated 1993 1997 Mercury-MerCruiser GM V8 454 CID 7.4L and 502 CID 8.2L Marine Engines Service Manual Number 16 4.5 out of 5.0 based on 4 product reviews. Hugely helpful service manual! Perfect. Thank you!
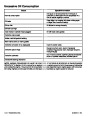
Manuals are all Important for Technician
This book is invaluable if you do your own repairs. Great book.
Could not find a copy until a search brought me here.
Excellent print.
Thank you