


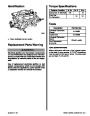


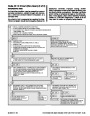


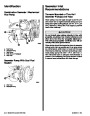


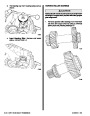


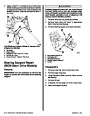


Installation
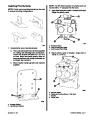
IMPORTANT: Be sure to install new pistons in
same cylinders for which they were fitted, and
used pistons in same cylinder from which they
were removed. Each connecting rod and bearing
cap should be marked, beginning at front of en-
gine (1, 3, 5 and 7 in left bank and 2, 4, 6 and 8 in
right bank). Numbers on connecting rod and
bearing cap must be on same side when installed
in cylinder bore. If a connecting rod is ever trans-
posed from one block or cylinder to another, new
bearings should be fitted and connecting rod
should be numbered to correspond with new cyl-
inder number.
IMPORTANT: Cylinder bores must be clean be-
fore piston installation. Clean with a light honing,
as necessary. Then clean with hot water and de-
tergent wash. After cleaning, swab bores several
times with light engine oil and clean cloth, then
wipe with a clean dry cloth.
1.
2.
3.
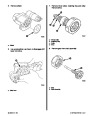
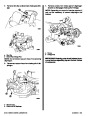
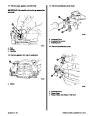
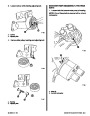
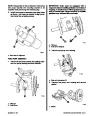
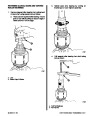
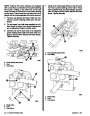
Lubricate connecting rod bearings and install in
rods and rod caps.
Lightly coat pistons, rings and cylinder walls with
light engine oil.
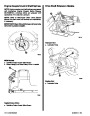
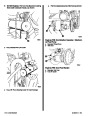
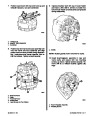
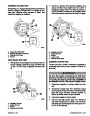
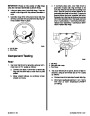
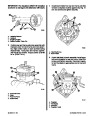
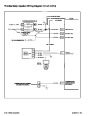
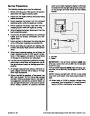
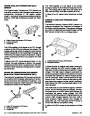
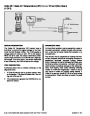
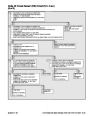
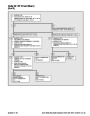
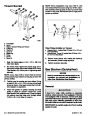
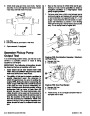
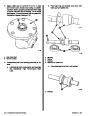
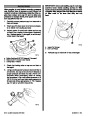
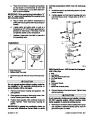
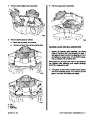
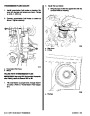
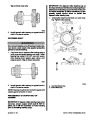
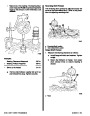
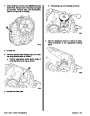
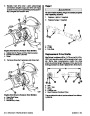
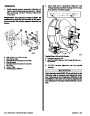
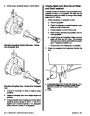
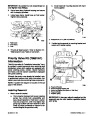
With bearing caps removed, install connecting
rodboltguide(3/8-24,usetoolJ-5239or7/16-20,
use tool J-35228) on connecting rod bolts.
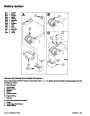
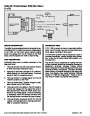
a
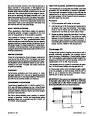
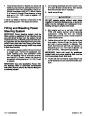
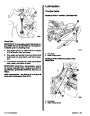
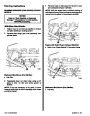
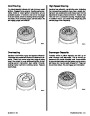
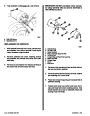
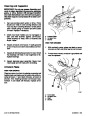
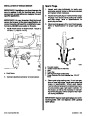
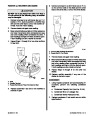
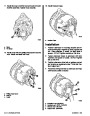
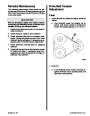
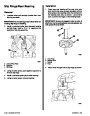
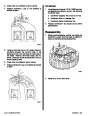
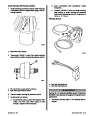
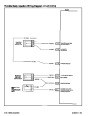
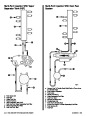
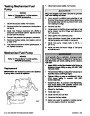
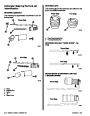
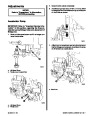
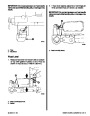
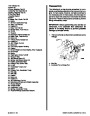
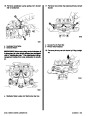
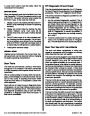
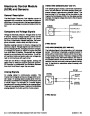
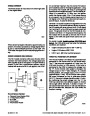
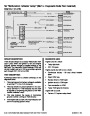
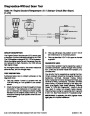
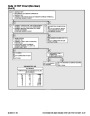
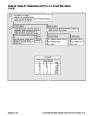
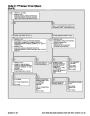
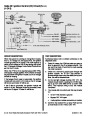
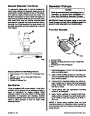
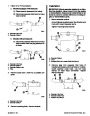
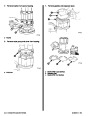
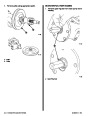
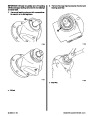
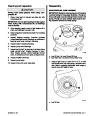
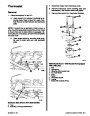
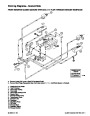
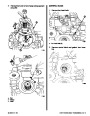
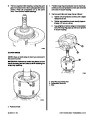
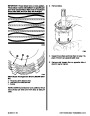
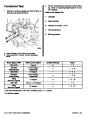
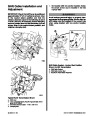
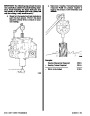
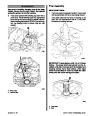
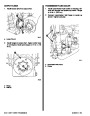
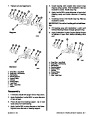
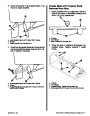
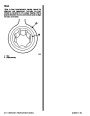
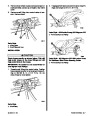
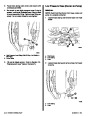
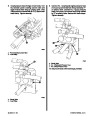
IMPORTANT:Besureringgapsareproperlyposi-
tioned as shown.
1
3
2
b
b
b
c
a
d
c
a
d
b
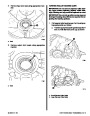
72552
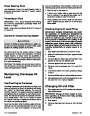
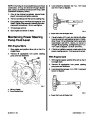
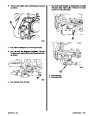
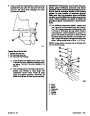
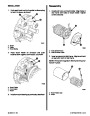
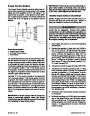
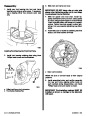
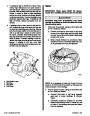
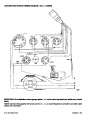
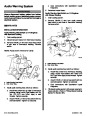
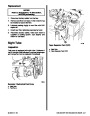
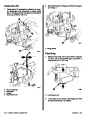
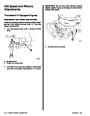
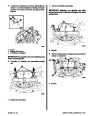
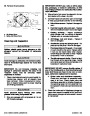
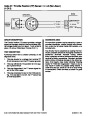
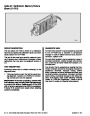
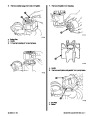
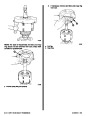
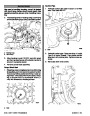
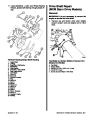
a - Piston Ring Compressor (J-8037)
72373
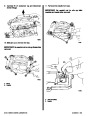
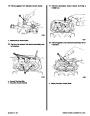
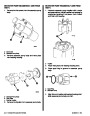
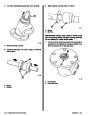
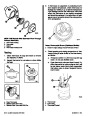
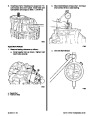
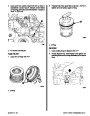
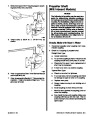
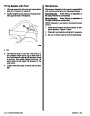
5.
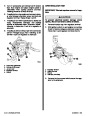
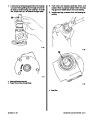
Remove connecting rod bolt guide.
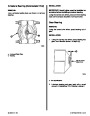
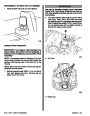
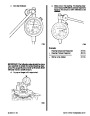
Ring Gap Location
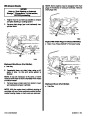
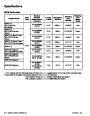
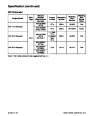
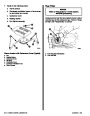
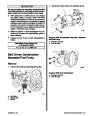
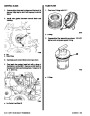
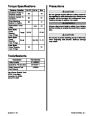
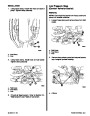
6. Install bearing caps and evenly torque nuts. Re-
fer to “Specifications”.
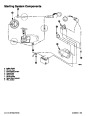
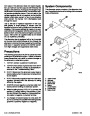
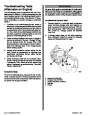
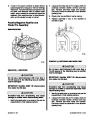
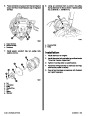
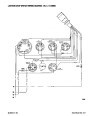
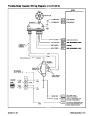
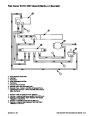
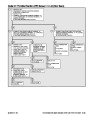
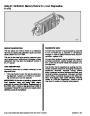
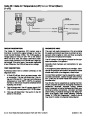
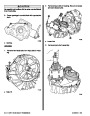
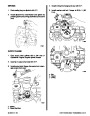
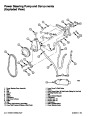
1
2
3
- Port Side
- Engine Front
- Starboard Side
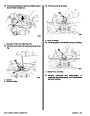
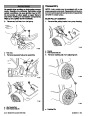
7.
Check connecting rod side clearance as pre-
viously described.
a - Oil Ring Spacer Gap (Tang In Hole Or Slot Within Arc)
b - Oil Ring Gaps
c - 2nd Compression Ring Gap
d - Top Compression Ring Gap
NOTE:If bearing replacement is required, refer to
“Connecting Rod Bearings.”
8.
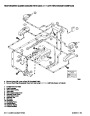
Install as previously outlined:
a. Oil pump and baffle.
b. Dipstick and oil pan.
c. Cylinder heads.
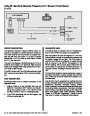
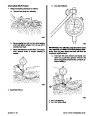
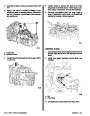
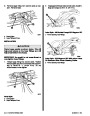
4.
Install each connecting rod and piston assembly
in its respective bore. Install with connecting rod
bearing tangs toward outside of cylinder block.
Use piston ring compressor to compress rings.
Guide connecting rod into place on crankshaft
journal with connecting rod bolt guide. Use a
hammer handle with light blows to install piston
into bore. Hold ring compressor firmly against
cylinder block until all piston rings have entered
cylinder bore.
d. Intake manifold.
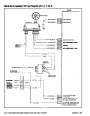
e. Distributor.
9.
Fill crankcase with oil. Refer to Section 1 - “Main-
tenance.”
Index
90-823224--2
796
454 CID (7.4L) / 502 CID (8.2L) - 3A-53
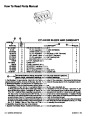
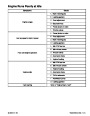
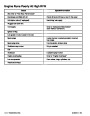
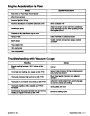
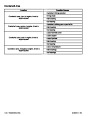
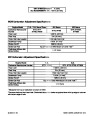
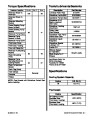
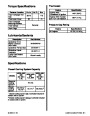
| Categories | Mercury MerCruiser Manuals |
|---|---|
| Tags | Mercury MerCruiser 454 CID, Mercury MerCruiser 502 CID |
| Model Year | 1993, 1994, 1995, 1996, 1997 |
| Download File |
|
| Document File Type | |
| Copyright | Attribution Non-commercial |
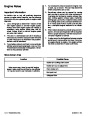
(4 votes, average: 4.5 out of 5)
Marine readers have rated 1993 1997 Mercury-MerCruiser GM V8 454 CID 7.4L and 502 CID 8.2L Marine Engines Service Manual Number 16 4.5 out of 5.0 based on 4 product reviews. Hugely helpful service manual! Perfect. Thank you!
Manuals are all Important for Technician
This book is invaluable if you do your own repairs. Great book.
Could not find a copy until a search brought me here.
Excellent print.
Thank you