


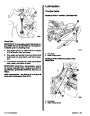


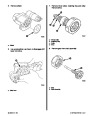


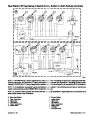
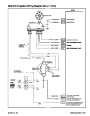

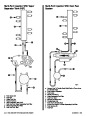
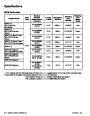
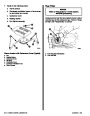


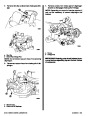


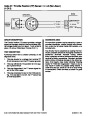
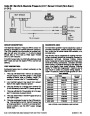


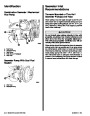
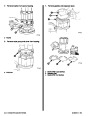


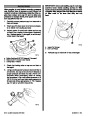


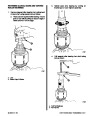


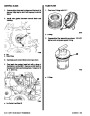


2.
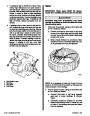
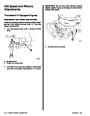
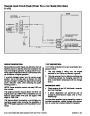
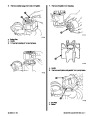
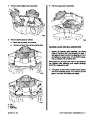
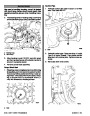
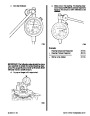
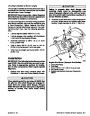
Using camshaft bearing remover and installer set
(J-6098-01) (with nut and thrust washer installed
to end of threads), position pilot in front camshaft
bearing and install puller screw through pilot.
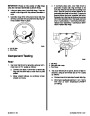
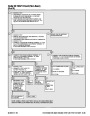
Inspection
Clean camshaft bearing bores in cylinder block with
solvent and blow out with compressed air. Be sure
grooves and drilled oil passages are clean.
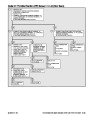
3.
4.
Install tool with shoulder toward bearing. Be sure
a sufficient amount of threads are engaged.
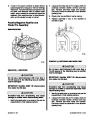
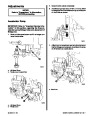
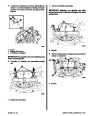
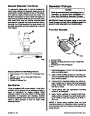
Installation
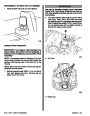
Using two wrenches, hold puller screw while turn-
ing nut. When bearing has been pulled from bore,
remove tool and bearing from puller screw.
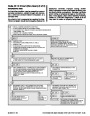
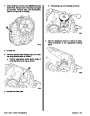
Front and rear bearings must be installed last as pilot
will not fit into bearing bores if bearings are installed.
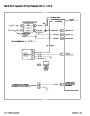
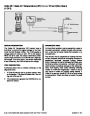
5.
Remove remaining bearings (except front and
rear) in same manner. It will be necessary to posi-
tion pilot in rear camshaft bearing to remove rear
intermediate bearing.
Lubricate outer surface of new camshaft bearings
with engine oil to ease installation.
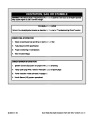
IMPORTANT: All camshaft bearings are not the
same. Be sure to install bearings in proper loca-
tions (Indicated by bearing manufacturer) and to
position bearings as follows (directional refer-
ences are in reference to engine in its normal op-
erating position):
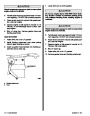
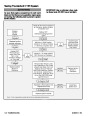
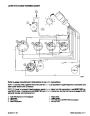
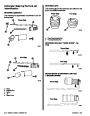
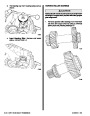
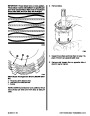
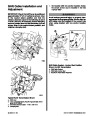
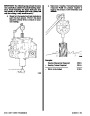
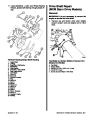
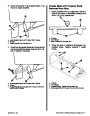
a
•
Front bearing must be positioned so that oil
holes are equal distance from 6 o’clock posi-
tion in the block. Intermediate and center
bearings must be positioned so that oil holes
are at the 5 o’clock position (toward left side
of block and at a position even with bottom of
cylinder bore). Rear bearing must be posi-
tioned so that oil hole is at the 12 o’clock posi-
tion.
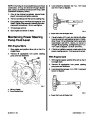
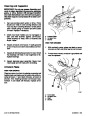
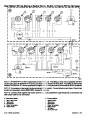
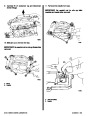
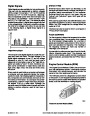
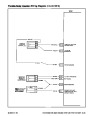
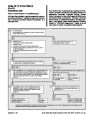
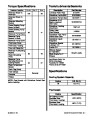
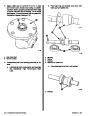
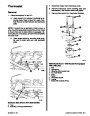
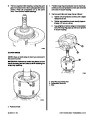
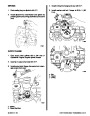
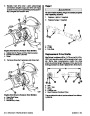
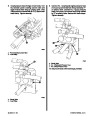
c
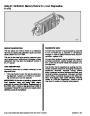
b
d
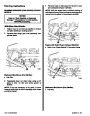
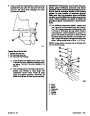
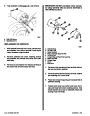
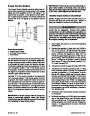
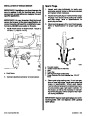
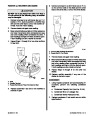
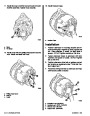
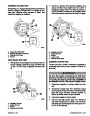
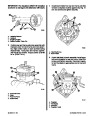
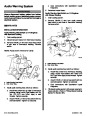
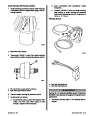
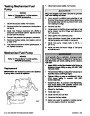
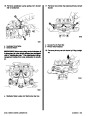
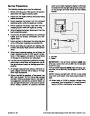
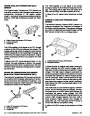
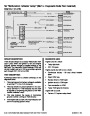
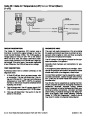
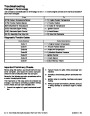
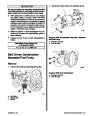
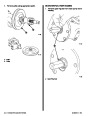
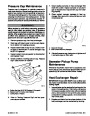
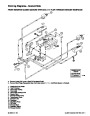
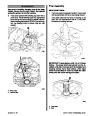
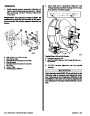
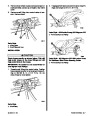
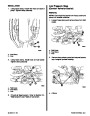
72571
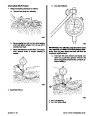
a - Index Point
b - Puller Screw
c - Driver
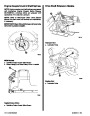
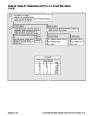
1.
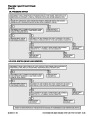
Installing intermediate and center bearings:
d - Bearing
a. Install nut and thrust washer all the way onto
puller screw, then position pilot in front cam-
shaft bearing bore and insert screw through
pilot.
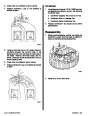
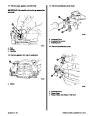
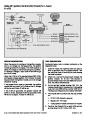
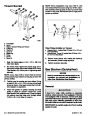
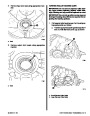
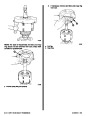
6.
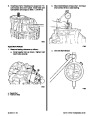
Assemble driver on driver handle and remove
front and rear camshaft bearings by driving to-
ward center of cylinder block.
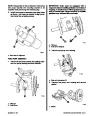
b. Index center camshaft bearing, then position
appropriate size remover and installer tool in
bearing and thread puller screw into tool. Be
sureatleast1/2in.(13mm)ofthreadsareen-
gaged.
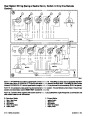
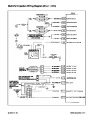
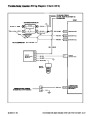
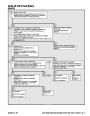
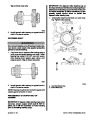
c
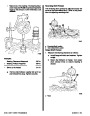
c. Using two wrenches, hold puller screw and
turn nut until bearing has been pulled into po-
sition. Remove the remover and installer tool
and check to ensure that oil hole(s) in bearing
are positioned correctly.
d. Install intermediate bearings in same manner
being sure to index bearings correctly. It will
be necessary to position pilot in rear cam-
shaft bearing bore to install rear intermediate
bearing.
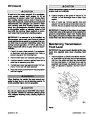
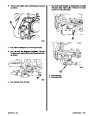
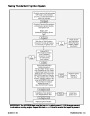
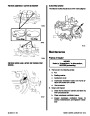
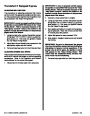
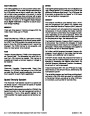
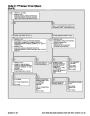
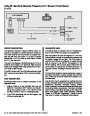
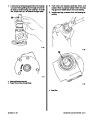
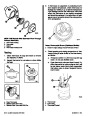
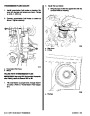
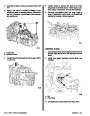
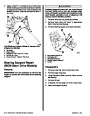
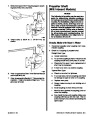
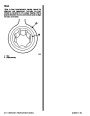
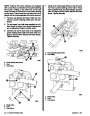
b
a
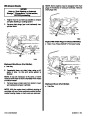
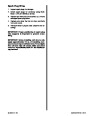
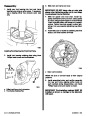
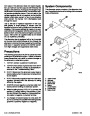
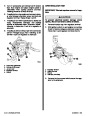
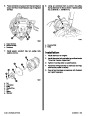
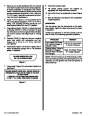
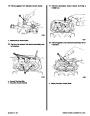
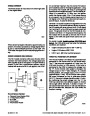
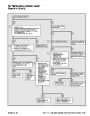
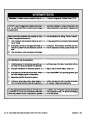
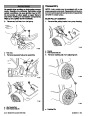
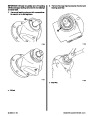
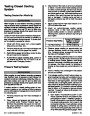
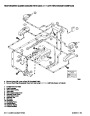
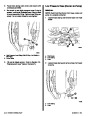
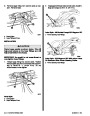
72548
a - Driver
b - Driver Handle
c - Bearing
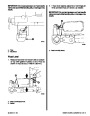
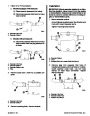
2.
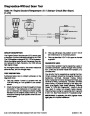
Installing front and rear bearings:
a. Install appropriate size remover and installer
tool on drive handle.
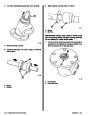
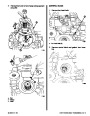
Index
90-823224--2
796
454 CID (7.4L) / 502 CID (8.2L) - 3A-59
| Categories | Mercury MerCruiser Manuals |
|---|---|
| Tags | Mercury MerCruiser 454 CID, Mercury MerCruiser 502 CID |
| Model Year | 1993, 1994, 1995, 1996, 1997 |
| Download File |
|
| Document File Type | |
| Copyright | Attribution Non-commercial |
(4 votes, average: 4.5 out of 5)
Marine readers have rated 1993 1997 Mercury-MerCruiser GM V8 454 CID 7.4L and 502 CID 8.2L Marine Engines Service Manual Number 16 4.5 out of 5.0 based on 4 product reviews. Hugely helpful service manual! Perfect. Thank you!
Manuals are all Important for Technician
This book is invaluable if you do your own repairs. Great book.
Could not find a copy until a search brought me here.
Excellent print.
Thank you