


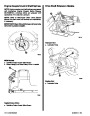
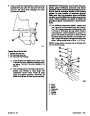


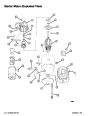


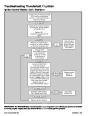


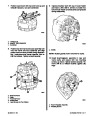


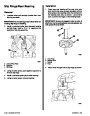
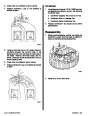


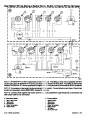


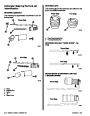
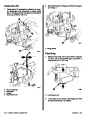


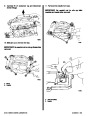
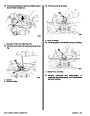


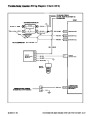


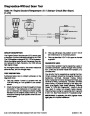
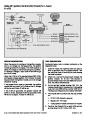


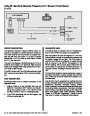


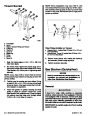
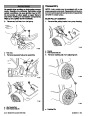
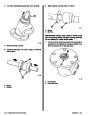


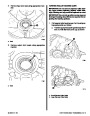

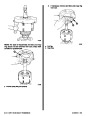


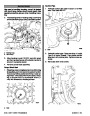

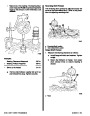
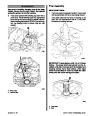


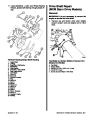
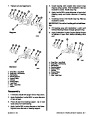


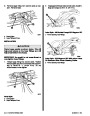


WITH CRANKSHAFT REMOVED
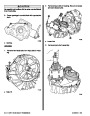
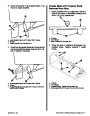
3. Rotate the crankshaft clockwise as viewed from
the front of engine. This will roll upper bearing out
of block.
1.
2.
Remove and inspect the crankshaft as outlined.
Remove the main bearings from the cylinder
block and main bearing caps.
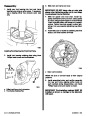
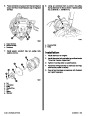
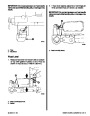
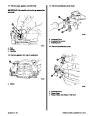
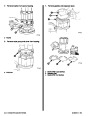
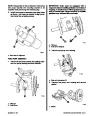
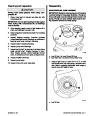
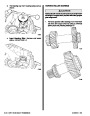
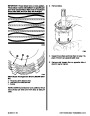
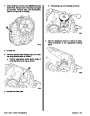
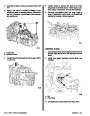
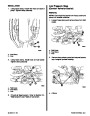
4.
Oil new selected size upper bearing and insert
plain (no notched) end between crankshaft and
indented or notched side of block. Rotate the
bearing into place and remove tool from oil hole
in crankshaft journal.
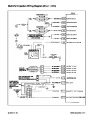
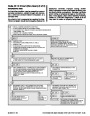
3.
Coat bearing surfaces of new, correct size, main
bearings with oil and install in the cylinder block
and main bearing caps.
4.
Install the crankshaft.
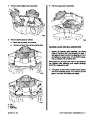
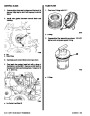
5. Oil new lower bearing and install in bearing cap.
6.
Install main bearing cap with marks made on dis-
assembly (or arrows, if present) pointing toward
front of engine.
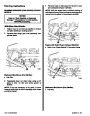
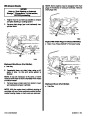
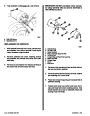
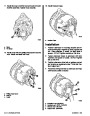
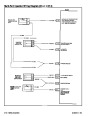
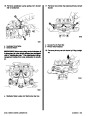
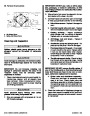
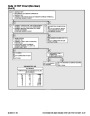
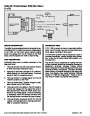
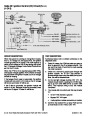
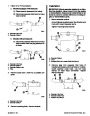
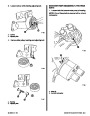
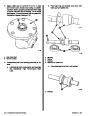
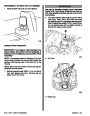
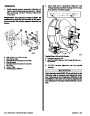
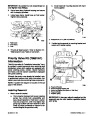
WITHOUT CRANKSHAFT REMOVED
IMPORTANT: Inspect bearing caps for orienta-
tion marks prior to removal. If no markings exist,
make suitable marks before disassembly so that
they can be reinstalled in their original locations.
7.
Torque all main bearing caps, EXCEPT THE
REAR MAIN CAP, to 110 lb. ft. (149 N·m). Torque
rear main bearing cap to 10-12 lb. ft. (14-16
N·m); then tap end of crankshaft, first rearward
then forward with a lead hammer. This will line up
rear main bearing and crankshaft thrust sur-
faces. Torque rear main bearing cap to 110 lb. ft.
(149 N·m).
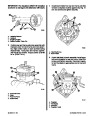
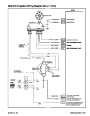
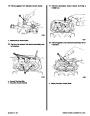
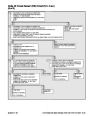
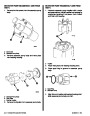
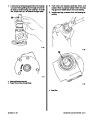
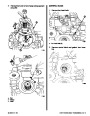
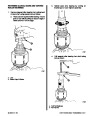
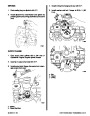
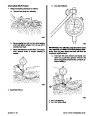
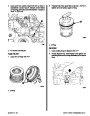
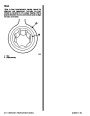
1.
With oil pan, oil pump and spark plugs removed,
make suitable marks on cap and remove cap on
main bearing requiring replacement. Remove
bearing from cap.
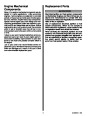
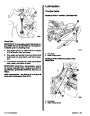
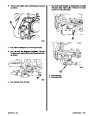
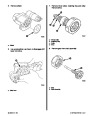
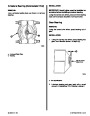
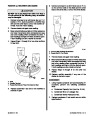
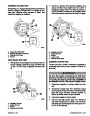
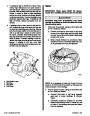
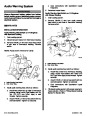
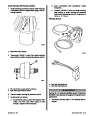
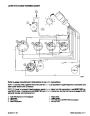
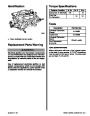
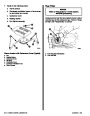
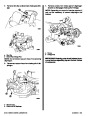
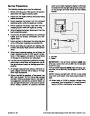
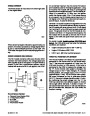
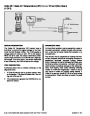
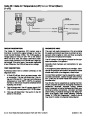
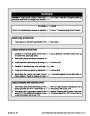
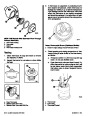
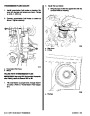
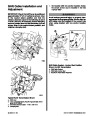
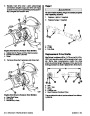
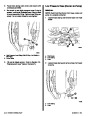
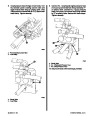
2.
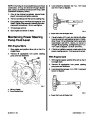
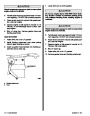
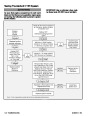
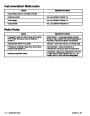
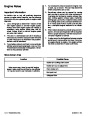
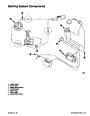
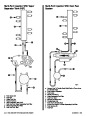
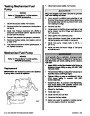
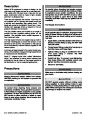
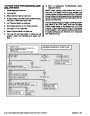
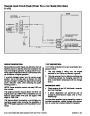
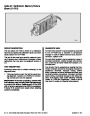
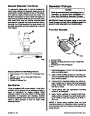
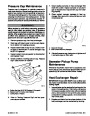
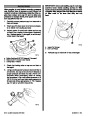
Install main bearing remover/installer in oil hole
in crankshaft journal. If such a tool is not avail-
able,acotterpinmaybebent,asshown,todothe
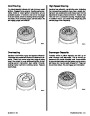
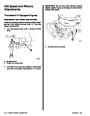
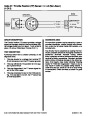
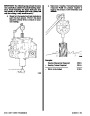
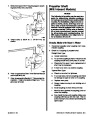
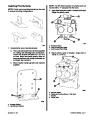
Connecting Rod Bearings
job.
Connecting rod bearings are of the precision insert
type and do not use shims for adjustment. DO NOT
FILE RODS OR ROD CAPS. If clearances are found
to be excessive, a new bearing will be required. Ser-
vice bearings are available in standard size and .001
in. and .002 in. undersize for use with new and used
standard size crankshafts, and in .010 in. and .020 in.
undersize for use with reconditioned crankshafts.
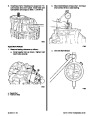
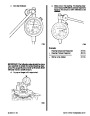
b
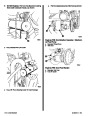
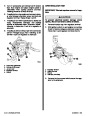
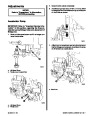
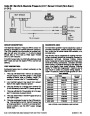
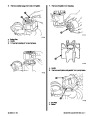
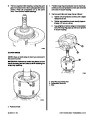
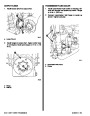
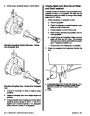
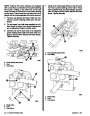
Inspection and Replacement
IMPORTANT: Before you remove the connecting
rod cap, mark the side of the rod and cap with the
cylinder number to assure matched reassembly
of rod and cap.
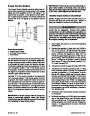
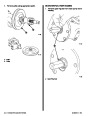
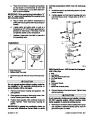
a
72556
a - Main Bearing Remover / Installer (J-8080)
b - Cotter Pin
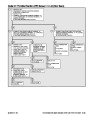
1. With oil pan and oil pump removed, mark the side
of the rod and cap with the cylinder number and
remove the connecting rod cap and bearing.
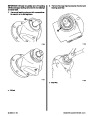
2.
Inspect the bearing for evidence of wear and
damage. Do not reinstall a worn or damaged
bearing.
3.
Wipe both upper and lower bearing shells and
crank pin clean of oil.
Index
90-823224--2
796
454 CID (7.4L) / 502 CID (8.2L) - 3A-47
| Categories | Mercury MerCruiser Manuals |
|---|---|
| Tags | Mercury MerCruiser 454 CID, Mercury MerCruiser 502 CID |
| Model Year | 1993, 1994, 1995, 1996, 1997 |
| Download File |
|
| Document File Type | |
| Copyright | Attribution Non-commercial |
(4 votes, average: 4.5 out of 5)
Marine readers have rated 1993 1997 Mercury-MerCruiser GM V8 454 CID 7.4L and 502 CID 8.2L Marine Engines Service Manual Number 16 4.5 out of 5.0 based on 4 product reviews. Hugely helpful service manual! Perfect. Thank you!
Manuals are all Important for Technician
This book is invaluable if you do your own repairs. Great book.
Could not find a copy until a search brought me here.
Excellent print.
Thank you